How to create a scenario for the SSK? (a SSK Tutorial)
The following instructions help users create a scenario for the SSK. These instructions are themselves conceived as a “scenario”, a step-by-step tutorial. First, contributors should be aware that:
- they can submit their new scenarios directly in TEI - see The SSK data model (TEI) section - and upload them on the SSK GitHub (http://github.com/ParthenosWP4/SSK), or by using the dedicated SSK contribution workspace (still work in progress).
- scenarios and steps follow the same data model. The difference is that a scenario points to a set of steps whereas a step points to a set of external resources.
- It is possible to create a scenario in any language but ideally, we would advocate for at least bilingual scenarios, with an additional version in English, in order to make it more visible. The forthcoming user interface will implement such behaviour and in TEI, it is possible to translate the prose, by duplicating the elements head, desc or term, and adding xml:lang attributes.
Choose explicit titles starting with a verb or a gerund
The choice of good titles for a scenario and its steps is crucial. They will be the entry point for the readers, who need to understand at first reading the scope and the aim of a scenario. To ensure that the message will driven home, we advice to build titles :
- that starts with a verb or a gerund, describing the process (for a scenario) or the action (for a step) that the user will read about;
- with a number of characters comprised between 10 and 100.
References
- Leahy, Richard. ‘Twenty Titles for the Writer’. College Composition and Communication 43, no. 4 (1992): 516–19. https://doi.org/10.2307/358644.
- Documentation of the TEI element <head> element
Describing a scenario or a step
The description of the scenario and its steps is the longer text that the contributor has to provide.
- For a scenario, it should explain the scientific problematic and describe the solution put in place.
- For a step, It should describe the purpose of the action, how it relates with the previous ones and give an overall presentation of the different kind of methods and tools the resources would point to.
- For both, it is important to extend the acronyms cited and to briefly present the projects mentioned.
The form of this text should respect the following constraints:
It shouldn’t exceed 1500 characters (but should not be too short either).
It is possible to point to external links. In TEI, use the following code:
<ref target="//url here//">text of the link</ref>
Lists are also available. The TEI elements are <list> and <item>
References
- Universitat Autònoma de Barcelona. ‘Describing a Process’. Coursera. Accessed 29 June 2018. https://www.coursera.org/lecture/teaching-english/3-1-1-describing-a-process-mjuio.
- Documentation of the TEI element <desc> element
Associate keywords to the scenario or the step
In order to enhance discoverability and search relevance, the SSK resources are described with a set of controlled vocabularies, particularly created for describing Humanities research. They are:
- Research activities, taken from Tadirah;
- Research techniques, taken from Tadirah;
- Research objects, taken from Tadirah;
- Standards, taken from the SSK Standard Knowledge base (supported by DARIAH-IT);
- Disciplines, taken from aureHAL
When editing the description of a scenario, the available keywords are:
- Research Techniques
- Research objects
- Standards
- Disciplines
For the steps, the most important keyword is the Activity, that should be unique for each step. It also possible to pick some techniques, objects and standards. For each keyword type, we recommend to choose between 1 and 4 terms.
References
- TaDiRAH - Taxonomy of Digital Research Activities in the Humanities
- Documentation of the TEI element <term> element
- List of all available terms: Taxonomies)
Choose an illustration for the scenario
- The illustration must closely relates with the purpose of the scenario, i.e. not only with the discipline or the period studied.
- Screenshots are accepted.
- Landscape orientation image are recommended
- Maximum size : 2 Mo
- Accepted formats : png or jpg
- It must be published under the licence CC-BY or CC-0.
Identify relevant resources
Identifying state of the art references is a prerequisite before actually add the resources to the steps. When we are talking about resources, we mean a standardized tool, service or document helpful for the task completion.
They take the form of a digital object and have to be of one the following types:
- Specification (normative document) of a standard (spec);
- Technical reports (report);
- Scholarly papers (paper);
- A single scholarly monograph (book);
- Lists of bibliographic references (bibliography);
- Scripts and code samples (code);
- Computing libraries (library);
- Collection of structured data (database);
- Computing tool, software (tool);
- Curating or hosting service (service)
- Tutorials or guidelines (tutorial);
- Blog posts (blog);
- Specialised mailing list, forum, etc (community).
The resources should be separated into several groups:
- First, general resources like standard specifications
- Second, project-related resources, i.e. how the standards are used in a real research project.
References
Link the resources to the step
There is different ways to link resources to a step. The one we favour is the recording of the resource metadata in the dedicated SSK Zotero Library (see here).
The Zotero fields required by the SSK are:
Item type: The item type is most of the time identified by Zotero but it’s important to check it. The most used item types are:- webpage
- blogpost
- journal article
- book section
- book
- presentation
- conference Paper
- document
TitleAuthorDateUrl: The url of the resource is most of the time mandatory (except when the resource is a printed document unavailable online).abstract: An abstract is very important to give an overview of what the user will find under the linked resource. Zotero is very often able to get this abstract from the webpage, but it may be necessary to check it, and sometimes create it.Language: the language of the resource
Add resource to the Zotero Library
- To populate it, a Zotero account is necessary (create it here) as well as a membership in the SSK group (apply here).
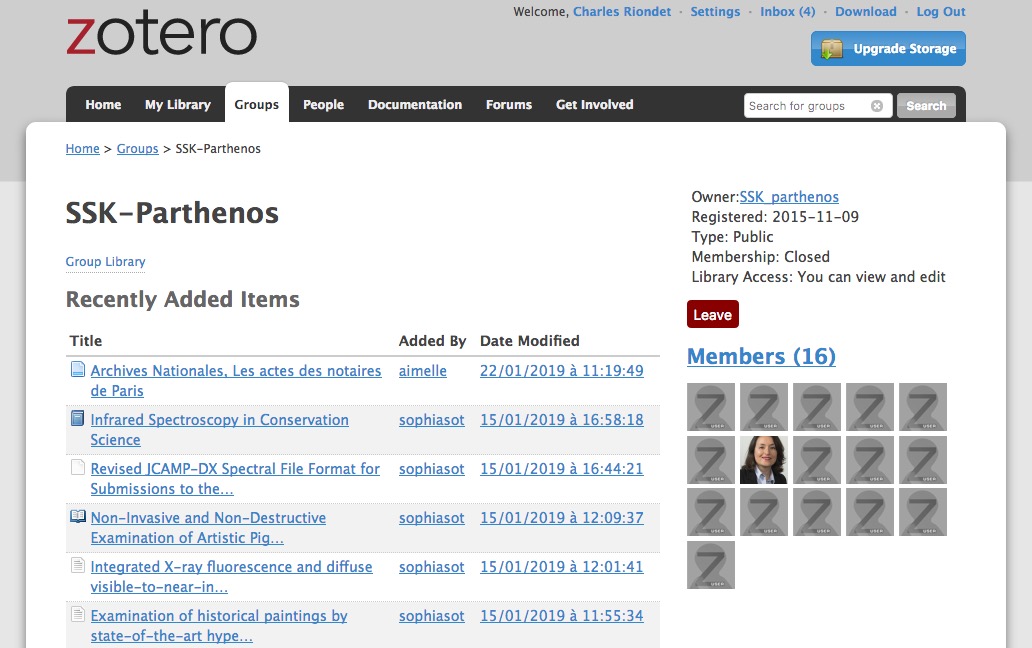
The SSK library is organized in collections and sub-collections, by domains or standards. To learn more about how to use Zotero, many tutorial and learning resources are available here.
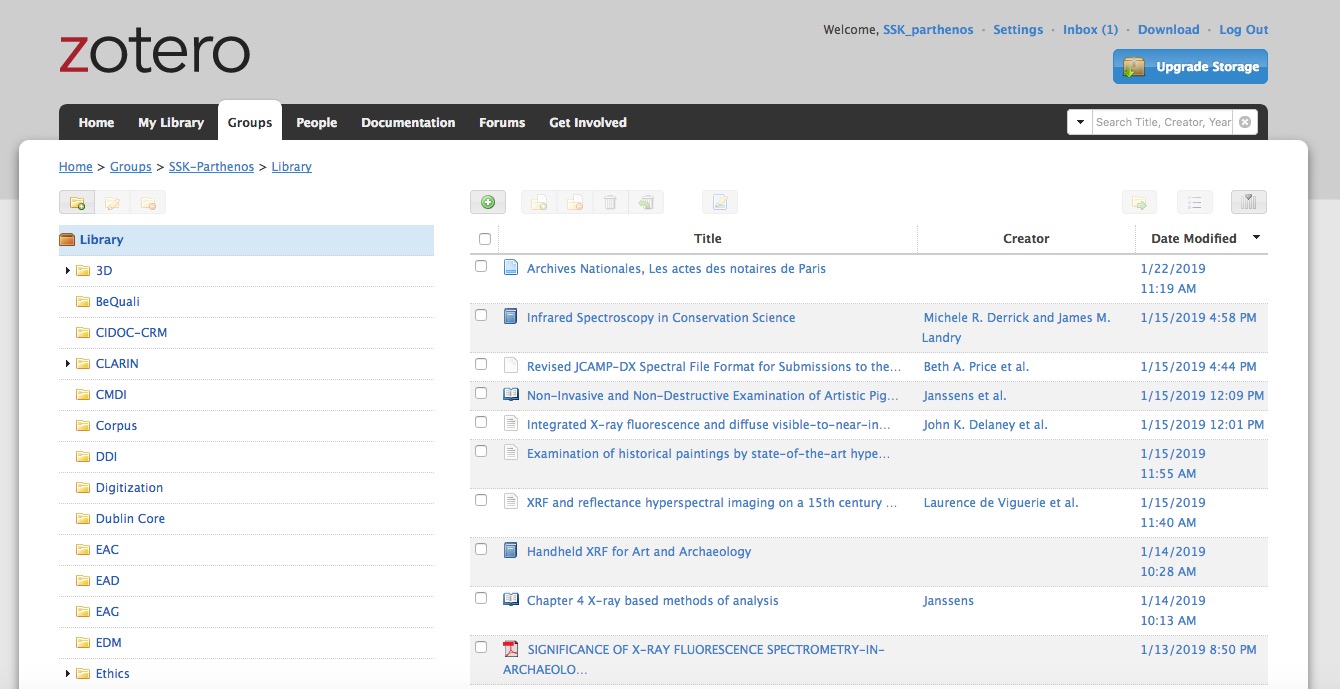
- Each group of resources (general and project specific) should be gathered: One group for the general resources and one group for each project. In the TEI, these groups are represented by <linkGrp> elements:
- One <linkGrp> for the general resources;
- one <linkGrp> for each project.
- The references added to the Zotero Library are linked to the step with the help of their Zotero key, i.e. the last part of the URL of the resource record on the Zotero website.
For instance, in the following example, the key is 4B62GJ5I: https://www.zotero.org/groups/427927/ssk-parthenos/items/itemKey/4B62GJ5I. In TEI, the Zotero key should be used like this:
<ref type="zotero" key="4B62GJ5I"/ >
References
- Documentation of the TEI element <linkGrp> element
- Documentation of the TEI element <ref> element
Advanced SSK functions (1) : customize a step
The SSK is adaptable by nature and contributors don’t have to start from scratch their scenario. It is possible to create a scenario with existing steps as basis. But if the content of the step doesn’t exactly fit, it is also possible to modify it, by updating the initial step (but with care), or, more safely, directly in the new scenario.
In TEI, the update of some elements is made with the help of the attribute @mode. See more in the section: Reuse/customize a step.
Advanced SSK functions (2) : link scenarios
Link scenarios together, or in other words, include a scenario (entirely or partially) into another is an interesting possibility when a scenario is a pre-condition or the continuation of another one. For instance, a scenario related to the preservation of 3D models can be preceded by a scenario explaining how to create such models.
The most common use cases are the following:
- Add a prerequisite scenario (as a first step)
- Associate a scenario that can be the follow-up of the current (as a last step)
- Insert a scenario (totally or partially) inside the current scenario, with the use of parameters that allows the user to choose which step of the external scenario should be included. See param.